
|
Epson Albums - 2/1/2004
Inro cover (126 pictures)
|
Even with the difficulties in not measuring correctly, the Inro came out really nice. |
||
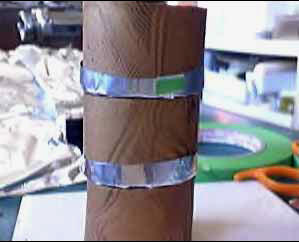
| 001 (1 - 29 of 126 pictures) Starting to put the outer layer on an Inro. Adding the rim on the lid so it doesn't slide about. Cut some aluminum foil for clay "resist". Clay will be next to clay that can't get stuck together. | |||
| 002 (30 - 60 of 126 pictures) While the top is curing I'm making aluminum foil "forms", using floral tape to hold the foil together. These forms will make a barrier on the cured clay on the inside while the raw clay on the outside cures. Where there is foil clay will not stick to clay. | |||
| 003 (61 - 90 of 126 pictures) Covering the bottom of the sections with aluminum foil and stacking them. Cutting raw clay sheet to cover the stacked cured sections. Cut it too short, lengthened it by pressing it in the pasta machine. Start of covering the cured inner part and measuring where the outer cover needs to be cut so the sections can be opened after curing. | |||
| 004 (91 - 126 of 126 pictures) Covering the cured inside with the raw outer sheet, slicing the outer sheet to where I thought I should, but the cuts were a bit off. I cured the inro anyway. | |||
|
Home
Monthly Highlights Since 8/2003 |
The official Clay vendor for |
ComboTutes:
New and old stuff First Three Years - Biz-Archive NJ Archive 1997-1999 | |
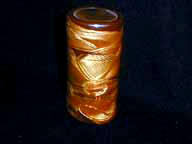 Inro
Finished
Inro
Finished