|
The Nattering |
||
| Here is the section for earlier efforts to capture Tigers Eye. | ||
|
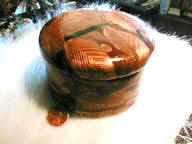
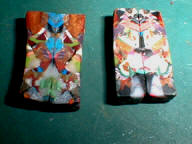
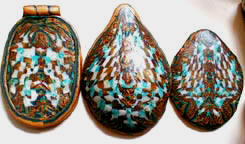
*2001 Tigers Eye Efforts Layers of Gold and a translucent tinted lightly with Burnt Umber gives you slices that will show what's underneath it. These half dozen pictures comes from clearing out the Epson albums and were not featured in the Tigers Eye Archive: Sheets, boxes, tables, bone necklace. . |
||
 12-27-07:
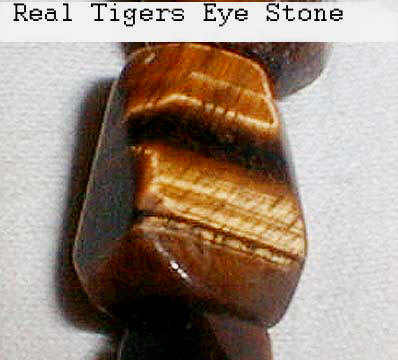
When replicating a gem stone it helps to have some samples on hand to
look at closely. 12-27-07:
When replicating a gem stone it helps to have some samples on hand to
look at closely.
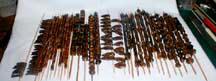
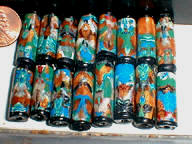
I realized that there's not only layers of colors: gold and brown, but also within the gold layers there's tiny lines that are vertical. I didn't have enough gold to do this experiment so I mixed one part gold, one part pearl, one part yellow, and 1/8th part burnt umber. I didn't have enough burnt umber for this experiment so I mixed burnt umber with copper, black, and scraps of brown. I didn't keep a record of that mix because I intend to use burnt umber next time. I found out that Tigers Eye stone was made from asbestos which forms in really fine fibers. That's what causes those tiny lines in the brown and gold layers. http://en.wikipedia.org/wiki/Tiger's_eye http://www.all-that-gifts.com/se/tigers_eye.html http://www.mineralminers.com/html/tigjlry.stm http://www.mindat.org/min-3960.html To replicate those fine vertical lines that meant that I had to press gold sheets to brown. Cut the resulting two color sheet, stack that, and press that again, for a sheet with four layers. I kept on doing that until I had fine lines and then cut and stacked that to have a block of fine lines. That's one layer on a faux Tigers Eye gem stone. When I got fine line stack for one layer I needed bands of gold and brown in different thicknesses. So I took sheets of gold and brown pressed at the widest setting on the pasta machine and set some aside. Then I took gold and brown sheets and pressed them together for a two color sheet, set that aside. Then I took gold and brown two sheets and pressed them together to get four lines, set that aside. Then I had a variety of thicknesses to stack around the vertical fine line layers. From that I cut thick slices and cut them on the angle to get those gem cut beads. From that I'd take one slice,
press it, then slice off thin ribbons off of the side to get the itty
bitty busy work seen in Group 3. With some of the scraps I made Mirror Tube Beads line the ones made 7-15-06.
Check out the "how-to" tutorial to add to this section. After a week of experimenting I had more than enough to share to start this discussion on CITY-0-Clay. |
||
|
Home
Monthly Highlights Since 8/2003 | The official Clay vendor for |
ComboTutes:
New and old stuff First Three Years - Biz-Archive NJ Archive 1997-1999 |